How to Set Up a Safe Home Workout Space (Even If Your Body Has Limits)
Exercise gets framed like a motivation problem, but for a lot of people, it’s a safety and confidence problem. If you live with limited mobility, chronic pain, joint sensitivity, fatigue, dizziness, or flare-ups that feel unpredictable, your environment matters more than any “perfect plan.”
A supportive home setup doesn’t need to be fancy. It needs to help you feel steady, reduce strain, and make it easier to start — even on days when your body feels complicated. The goal of this post is simple: help you create a space where movement feels doable, repeatable, and safe.
1) What “safe” actually means for limited mobility and chronic conditions
Safety isn’t just “don’t get hurt.” It’s also don’t pay for it later.
A safe home workout space is one that helps you avoid the most common reasons people quit:
- pain spikes that last 24–72 hours
- flares triggered by too much range of motion too soon
- balance scares that make you hesitant to try again
- exhausting set-ups that feel like a whole production
- transitions (floor to standing, kneeling, bending) that aggravate symptoms
This is why I love home-based movement when it’s set up well: you can choose what your body can handle that day. Your space can support:
- smaller ranges of motion
- slower pace
- more stability
- more options (chair, wall, counter)
- less getting up and down
If movement has felt intimidating in the past, you don’t need more willpower. You need fewer barriers.
2) The safety essentials (do these before you worry about equipment)
Many home “workout injuries” aren’t from the exercise itself, they’re from the environment. Slipping, tripping, twisting awkwardly, or losing balance mid-movement can turn a “gentle session” into a setback. Start here:
Clear the space more than you think you need to and look for the sneaky stuff that catches feet or pulls your attention:
- throw rugs (or secure them with a grippy pad)
- cords (chargers, lamps, baby monitors)
- clutter edges (shoes, baskets, toys, pet bowls)
- furniture corners that are close enough to bump into if you step sideways
A simple rule: you should be able to take 3–4 steps in any direction without worrying about tripping.
Make the surface predictable and ensure your feet to feel steady.
- if you are using a mad, make sure it cannot slide (even a little), by changing the floor surface or the trying a different mat
- deep carpet can feel unstable for balance work
- hardwood/tile can feel slippery without good grip
Check your lighting. If you ever feel dizzy, unsteady, or visually overwhelmed, dim lighting can amplify it. Bright, even lighting helps your brain feel oriented and stable.
Set up “support” on by having at least one stable support within arm’s reach:
- a sturdy chair (no wheels, no swivel)
- a wall
- a countertop or heavy table that won’t tip
Support is not cheating. It’s smart movement, especially when balance, joint pain, or fatigue are part of the picture.
3) Choose your “movement zone” (you don’t need a whole room)
You don’t need a home gym. You need a zone — a small, repeatable setup that makes starting easy.
Here are three zones I recommend, depending on your body and your current capacity:
The Chair + Wall Zone (most supportive, most versatile). This is my top pick for limited mobility, chronic pain, fatigue, or low confidence days because it gives you options without needing to get down on the floor.
- the chair gives you a stable base for seated mobility, posture work, and strength basics
- the wall gives you balance support for standing moves
- it reduces demanding transitions (especially if knees, hips, or dizziness are a factor)
Works well for: arthritis, joint pain, vestibular sensitivity, deconditioning, and “I don’t trust my balance yet” seasons.
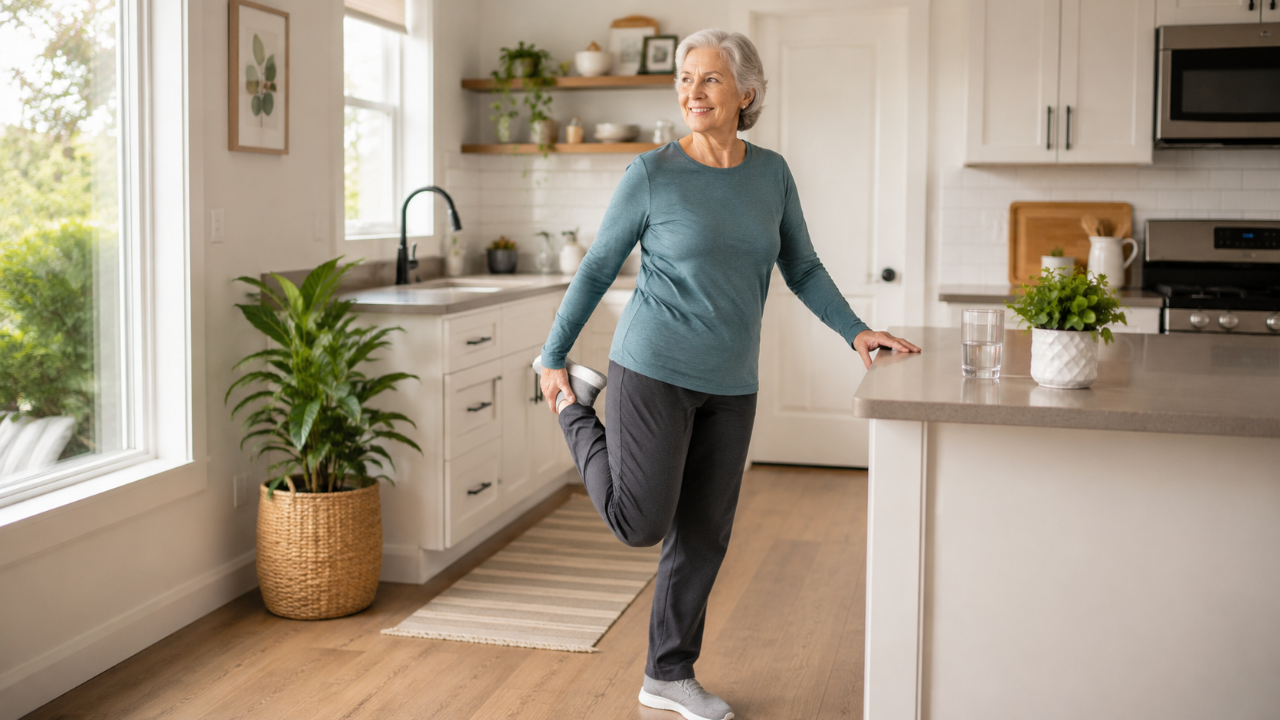
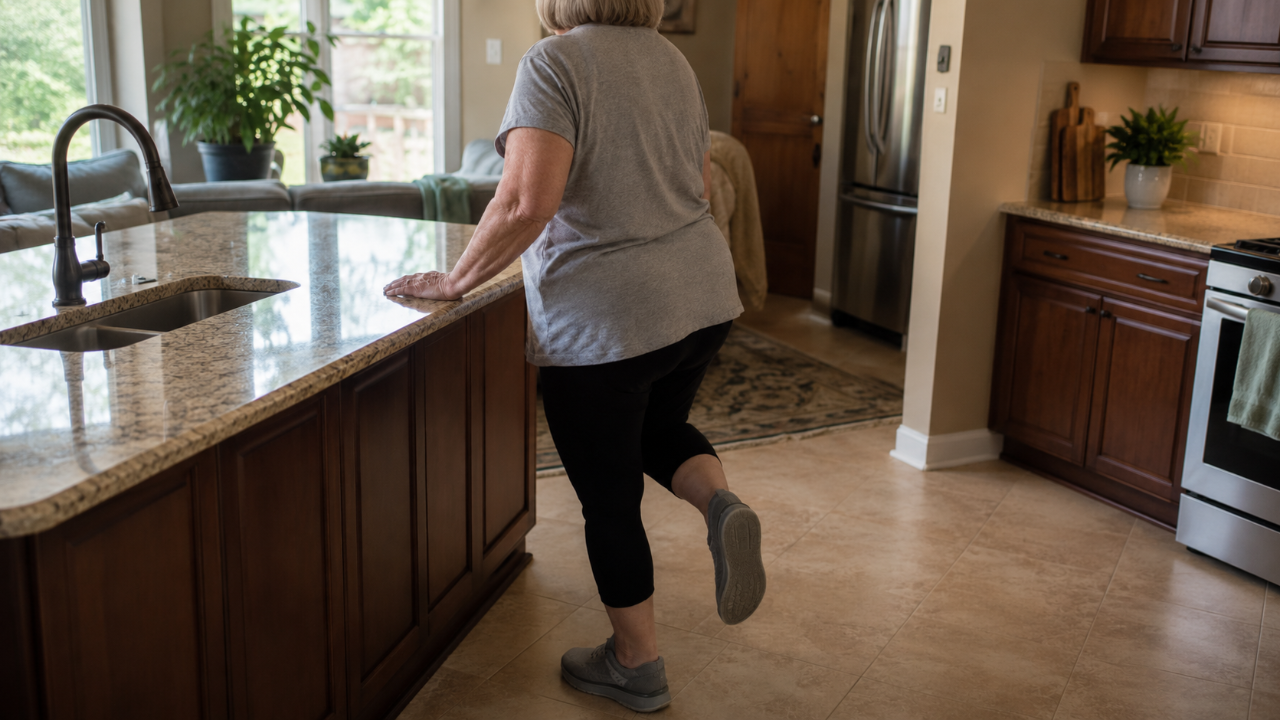
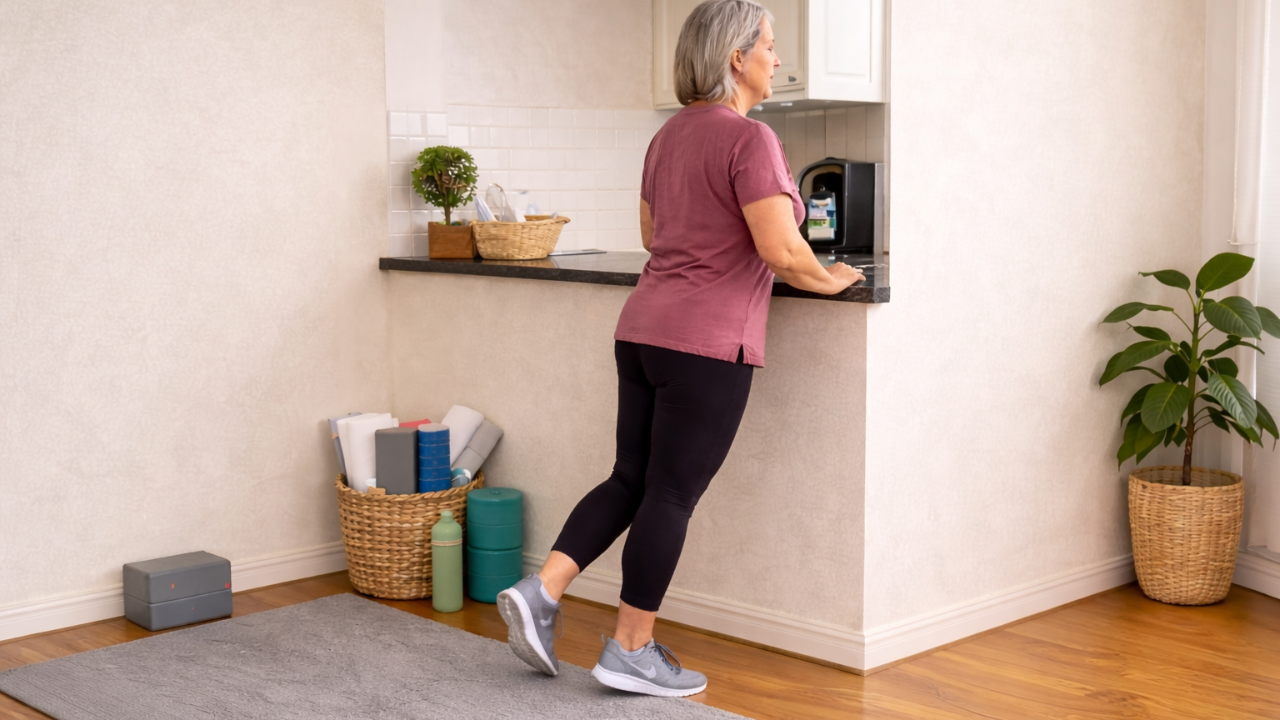
The Counter Zone (amazing for posture + balance). A kitchen counter is often more stable than people realize and it’s a great “anchor” for supported standing work.
- gentle squats/hinges with hands supported
- calf raises, marching, weight shifts
- shoulder + ribcage mobility work without feeling unstable
Works well for: balance challenges, low back sensitivity, beginners who want support but don’t want to sit the whole time.
The Floor Zone (only if transitions feel safe). Floor work can be great — but it’s not required, and it’s not always the safest choice if getting up/down is the most aggravating part.
If you choose this zone:
- have a stable surface nearby to help you stand
- use padding under knees/hips
- avoid “stretching into pain” and prioritize supported positions
Works well for: people who tolerate transitions well and want more options for hips/spine, breathwork, and gentle nervous system downshifts.
Best tip: pick one zone and keep it consistent. Consistency lowers the mental load.
4) The tools that actually help (and what to use if you don’t have them)
You don’t need a lot of equipment. You need a few things that make movement more supported and more customizable.
Here’s what I’d prioritize:
1) A sturdy chair: this is the most underrated piece of “equipment” for safe strength + mobility.
- sit-to-stands
- seated core + posture work
- supported single-leg work
- built-in breaks without stopping your session entirely
2) Something to elevate the floor (blocks, books, cushions). Raising the floor to meet you reduces strain.
- yoga blocks (or thick books)
- firm couch cushion
- folded towel to support hands or knees
3) A strap (or just a towel). Great for gentle range-of-motion work without yanking into end range.
- hamstring and calf mobility with control
- shoulder mobility without forcing
4) Small joint support
- pillow or rolled towel under knees
- small cushion for hips
- towel for neck/upper back support if you’re doing breathwork or floor positions
5) Optional: a light resistance band
Only if it feels good. Bands can add gentle strength without heavy loading — but they’re not necessary on day one.
Make it frictionless: keep these in a small basket in your zone. If you have to hunt for things, you’ll skip the session.
5) Set it up for real life (including low-energy days and flare days)
Most people accidentally create a setup for their best day, then wonder why they can’t stick with it. A sustainable home workout space supports your full range of days.
Aim for “start-ready in under 60 seconds”
- chair stays out
- mat stays down (if possible)
- basket stays stocked
- space stays mostly clear
If starting feels like a project, you’ll avoid it when life is busy or symptoms are up.
Build a default plan for low days. Have a simple routine you can do even at 50%:
- 2–3 minutes of seated mobility (neck/shoulders/ribs)
- 2–3 minutes of hips/ankles or gentle spinal movement
- 1–2 minutes of supported standing (weight shifts, marching, sit-to-stand)
That’s it. The win is showing your body, “We still move here.”
Scale smart (this is the order I recommend). When something feels like “too much,” adjust in this order:
- reduce range of motion
- slow the pace
- add support (chair/wall/counter)
- reduce total time
This protects joint tolerance and nervous system capacity — and it builds confidence over time.
Remember: the goal isn’t to prove anything. Your space is there to support you, not challenge you. Using a chair, taking breaks, skipping floor work, doing smaller movements — that’s not failure. That’s how you stay consistent long enough to actually feel change.
Don't wait to start feeling better in your body. Start your FREE 7-Day Trial and join a community that believes in your potential, one gentle movement at a time. Your fitness journey doesn't have to be overwhelming. With Inclusive Movement, it can be a journey of discovery, patience, and joy.
Follow along on Instagram, TikTok, and YouTube, or join the email list at the bottom of this page to get helpful wellness tips and tricks right into your inbox.